Crafty Lady
We're back to take a look at all those special, hand-crafted elements that can really bring a room to LIFE! Some are more complex than others sure, but there's loads you can try your hand at to make your space feel more personal - let's explore!
Do you recognise this beauty? The ultimate labour of love that was "Evangeline" feels right at home here. Created especially for the guest room where the most regular visitors will be my in-laws, I knew I had to bring my A-Game! The wood was always going to be her main feature - so warm and glowing and fine, it was love at first sight. After many hours sanding back the sides, doors, drawer fronts and top, it was time to start The Design...
Deciding on her wardrobe was a fun exercise in using my Fabulous Tin of Sticks with myself rather than a client - from time to time a colour-mixing whim will take me & I'll go mad with pipettes & jumbo lolly sticks, blending up new & interesting custom shades. I take them with me to client consultations - there's nothing like rummaging through, holding them up to your sofas or curtains, checking the light, so we get it spot on.
I definitely WASN'T expecting to land on these 3 colours but hey, the sticks don't lie! The custom blends for those with a MAJOR Fusion Mineral Paint habit like myself are:
Plum: 5 parts Cranberry: 1 part Twilight Geranium: 1 part Coal Black
Dusky pink: 50/50 Coral/Cranberry with a dash of Little Star & Brook
Lemon yellow: 4 parts Little Star: 4 parts Cathedral Taupe: 1 part Mustard
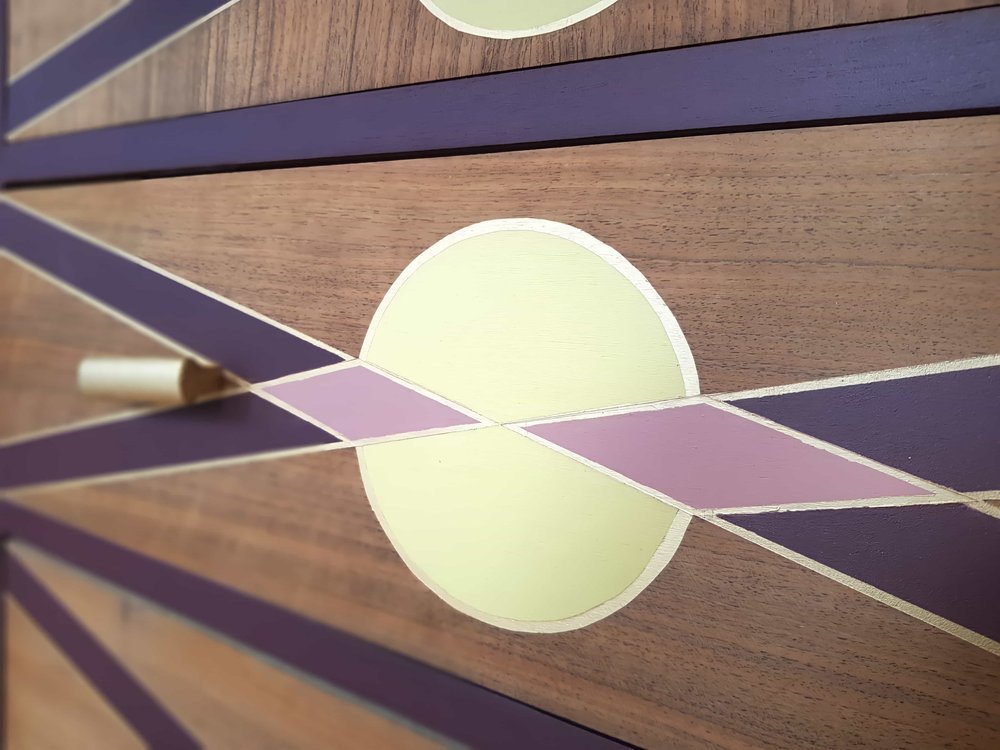
As the first glimpse of her would be side-on, I decided to create my most ambitious design to-date - an art deco inspired custom taped stunner featuring concentric circles with fans above and below in not one, not two, but THREE colours with gilded borders. Despite one side being against a wall currently, I had to mirror the design on both sides in case we ever move her - talk about making a rod for your own back!
The front was a whole new challenge - how to create a cohesive narrative for her design with oddly panelled doors and 3 drawers which were all fractionally different sizes?! So I decided to stick with the combination of sharp geometric lines married with soft curves, disguising some of the strange veneer patterns up top with this harlequin-esque design, then a criss-crossing effect on the drawers with sunny circles tying it all together. Most importantly, my mother-in-law loves her (phew!) And look how at home she feels in the overall scheme? Thank goodness for that!
Now that I'd found the perfect complimentary shades for that wallpaper, it only made sense to bring the scheme together using them elsewhere. So if you're thinking "gosh how lucky to find a lemon yellow bed base!" NOPE! I bought a dark grey second-hand pleather ottoman bed off Gumtree and painted it! Feel like having a go painting pleather? All you need is:
a good degreaser to give the surface a thorough clean
Two coats of Fusion Ultra-Grip for maximum adhesion (wait 24 hrs between coats)
2-3 coats of your choice of Fusion Mineral Paint applied in one direction using a brush or roller (my preference)
And BOY does it bring the room together! I hunted high and low for the perfect complimentary fabric to make the headboard - it had to have some texture to it but like the curtains I didn't want it to have a print as the walls are busy enough already! I eventually found this end-of-roll remnant at Dunelm and really lucked-out as it had that perfect hessian-like texture/weave I was after in a complimentary shade of soft lemon. Making your own custom headboard is easier than you might think - I've written a separate blog to give you a fool-proof set-by-step, you can find it here! <link>
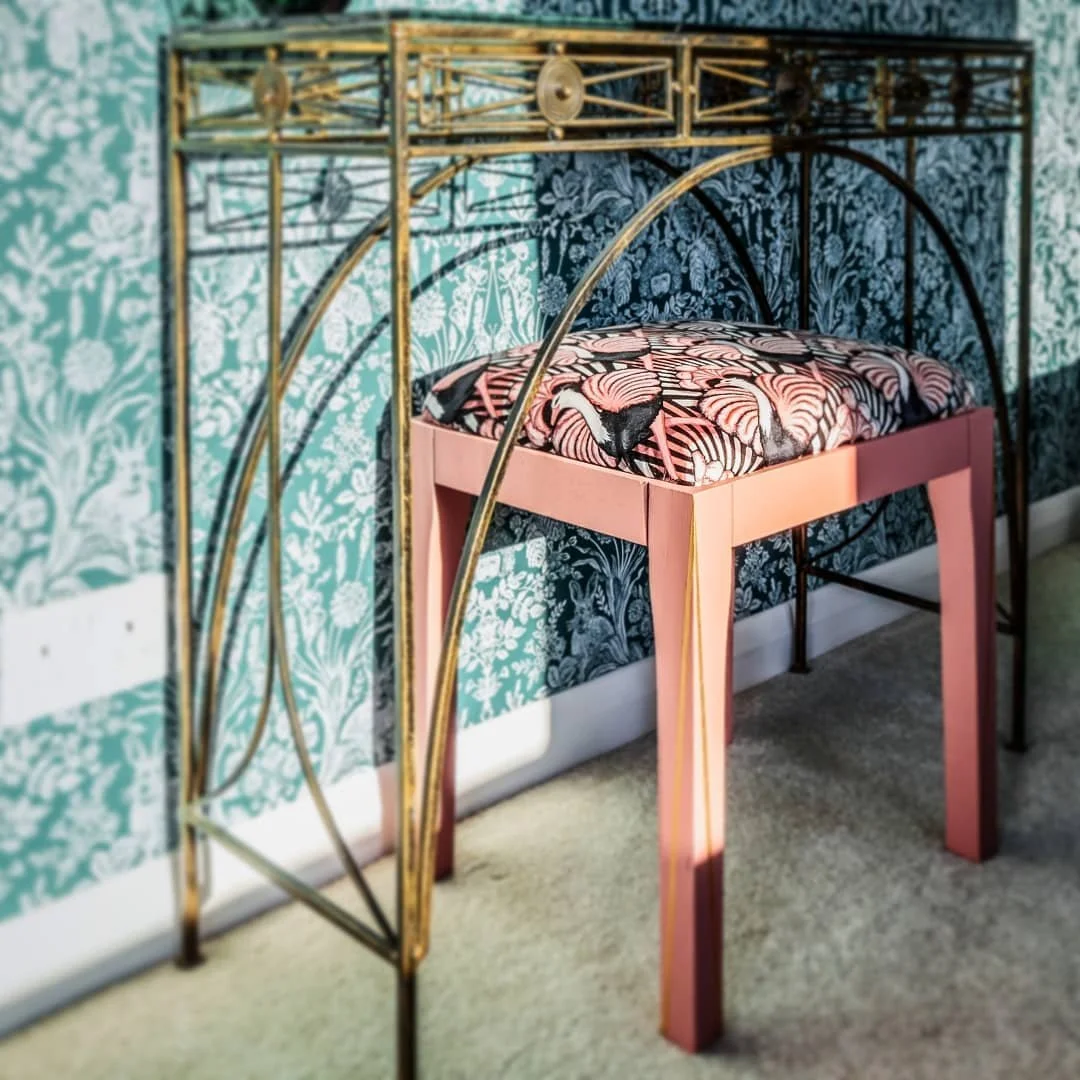
Of course every dressing table needs a fabulous stool, and the pink mix paint was a perfect match for Divine Savages Zsa Zsa velvet - it's almost like I plan these things...I got a duff little beat up stool off Gumtree for free, scuff sanded and cleaned the legs, painted in 2 coats of the pink then taped out some go-faster stripes to be painted in gold. I recovered the stool top after stripping it back and adding new foam and wadding, used an off-cut of the velvet and my trusty staple gun and whoa this baby was transformed!
One thing I'd always recommend is considering how you're going to ground your scheme - anyone can throw up a rainbow all over a room but if you want it to be liveable then you have to round it out. That means adding in earthier tones, natural elements and neutrals. The way I've achieved it here is to disperse natural wood around the room - I already had the exposed oak of the tallboy so added to this with a solid oak mirror I found on Marketplace. It was covered in goopy red lacquer, so I sanded it right back, oiled it, and painted just the inner rim gold.
Lastly, Mr Expert Touch got a "nice bit of elm" and made the wee 1/4 moon bedside shelves from it, which I then oiled using Osmo Oil Soft gold is another way to round out a space in an elegant way, and remember you can gild pretty much anything!
I bought these bog standard "brass effect" Dunelm curtain tieback hooks, undercoated them using Ultra Grip, then gilded them using Posh Chalk pigments - SO much classier!
Finally we came to one of my greatest bug-bears when decorating: switches...It really amazes me that despite how far we've come in terms of interior design, the general public is still stuck with 3-4 options when it comes to light switches and plug sockets! Why put all that effort into creating a stunning room only to plonk white plastic or brass effect monstrosities over your fabulous wallpaper?!
The main players (B&Q, Homebase, Wickes etc) were all coming up with the same-old same-old, and I was determined to find the solution for this project. So I visited CEF and bugged the very nice man there who I don't think had seen a female customer since 19-oatcake! He introduced me to Knightsbridge and I found these perfect slim-profile screwless powder coated switches which have the luxe-factor but don't break the bank.
Ready for a new room next time? See you then!


